

If you’re like me, you have a deep distaste for the ads, trackers, and popups plaguing every website and app you use.
Browser adblockers help on your laptop. But what about your phone? Your tablet? Your family’s devices?
In this post, I’ll show you how to set up a free, self-hosted VPN and adblocker that works on all your devices, at home and on the go. You can even share it with friends and family.
You’ll need:
- A Raspberry Pi or home server (something that stays up) connected to the internet
- One or more devices (phone, laptop, tablet) to block ads on
Step 1: Setting up a Pi-hole on your Raspberry Pi (or server)
Pi-hole is a lightweight, fast, and actively maintained project for DNS-based Ad Blocking.
It is supported by a good set of operating systems, and can be easily installed and setup to block ads for your network.
Installing Pi-hole is as simple as running:
curl -sSL https://install.pi-hole.net | bash
Configure network
After installing Pi-hole, you can start using it right away by setting your Pi’s IP address as your device’s DNS resolver.
If you want to make it work on your whole network, even for new devices, you should follow the Pi-hole post-install instructions. It will explain how to configure your router to use the Pi as a local DNS resolver. I recommend using the Pi as the primary resolver, and other DNS as fallbacks in case your primary fails. For extra privacy and control, you can configure the Pi-hole to do the DNS resolution itself, using unbound, to not rely on third party DNS resolvers.
Customizing blocklists
From the admin interface at http://pi.hole/admin/login, you can add and update Gravity lists (blocklists). For an exhaustive blocklist reference, see the dns-blocklists GitHub repo.
I only use these two (list 1, list 2), but this is enough to block about 30% of my traffic!
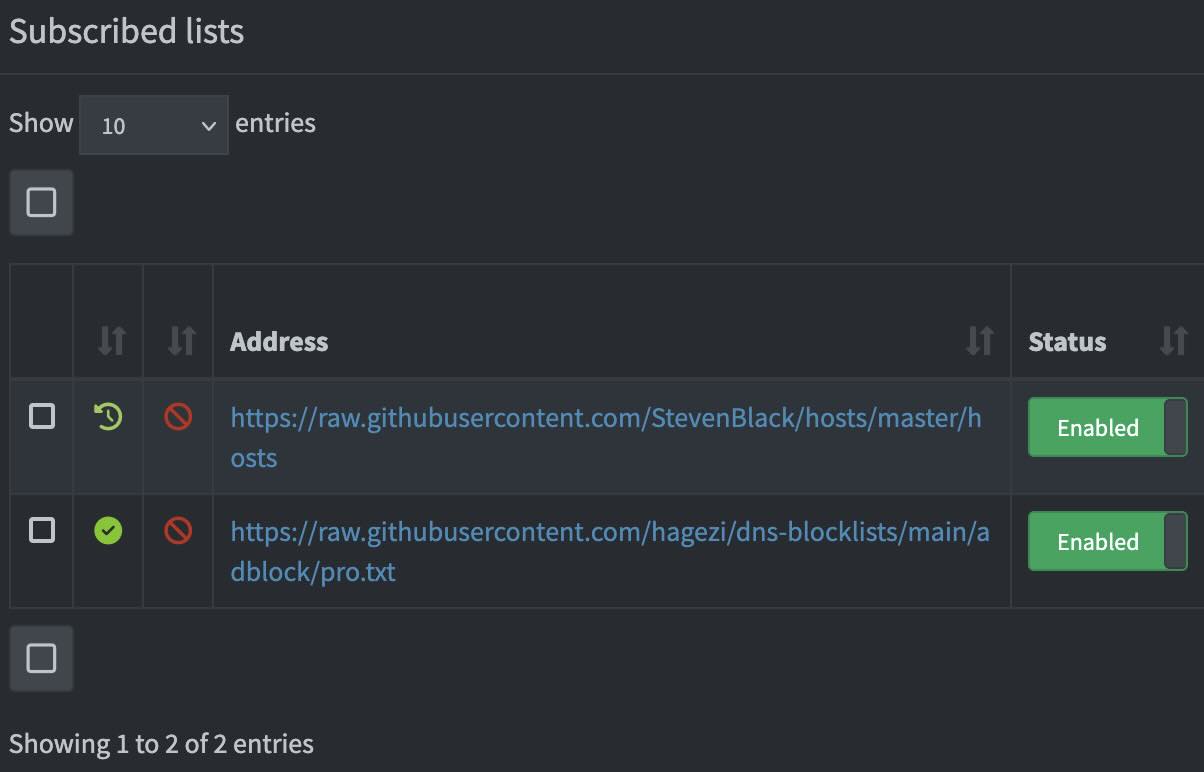
Pi-hole admin interface with custom blocklists enabled
Step 2: Installing Tailscale
The Tailscale installation doc has a very simple and detailed installation process. You first need to create an account, and install Tailscale on both the machine with the fresh Pi-hole install, and any device you want to use it with.
Make sure Tailscale starts on boot
Although Tailscale should be able to take care of this itself, you can easily ensure that it will always start when you boot your Pi by running:
sudo systemctl enable tailscale.service
Setup the Pi as your global DNS nameserver
Now that your Tailscale network is up, you can select a nameserver to serve as your network’s DNS resolver.
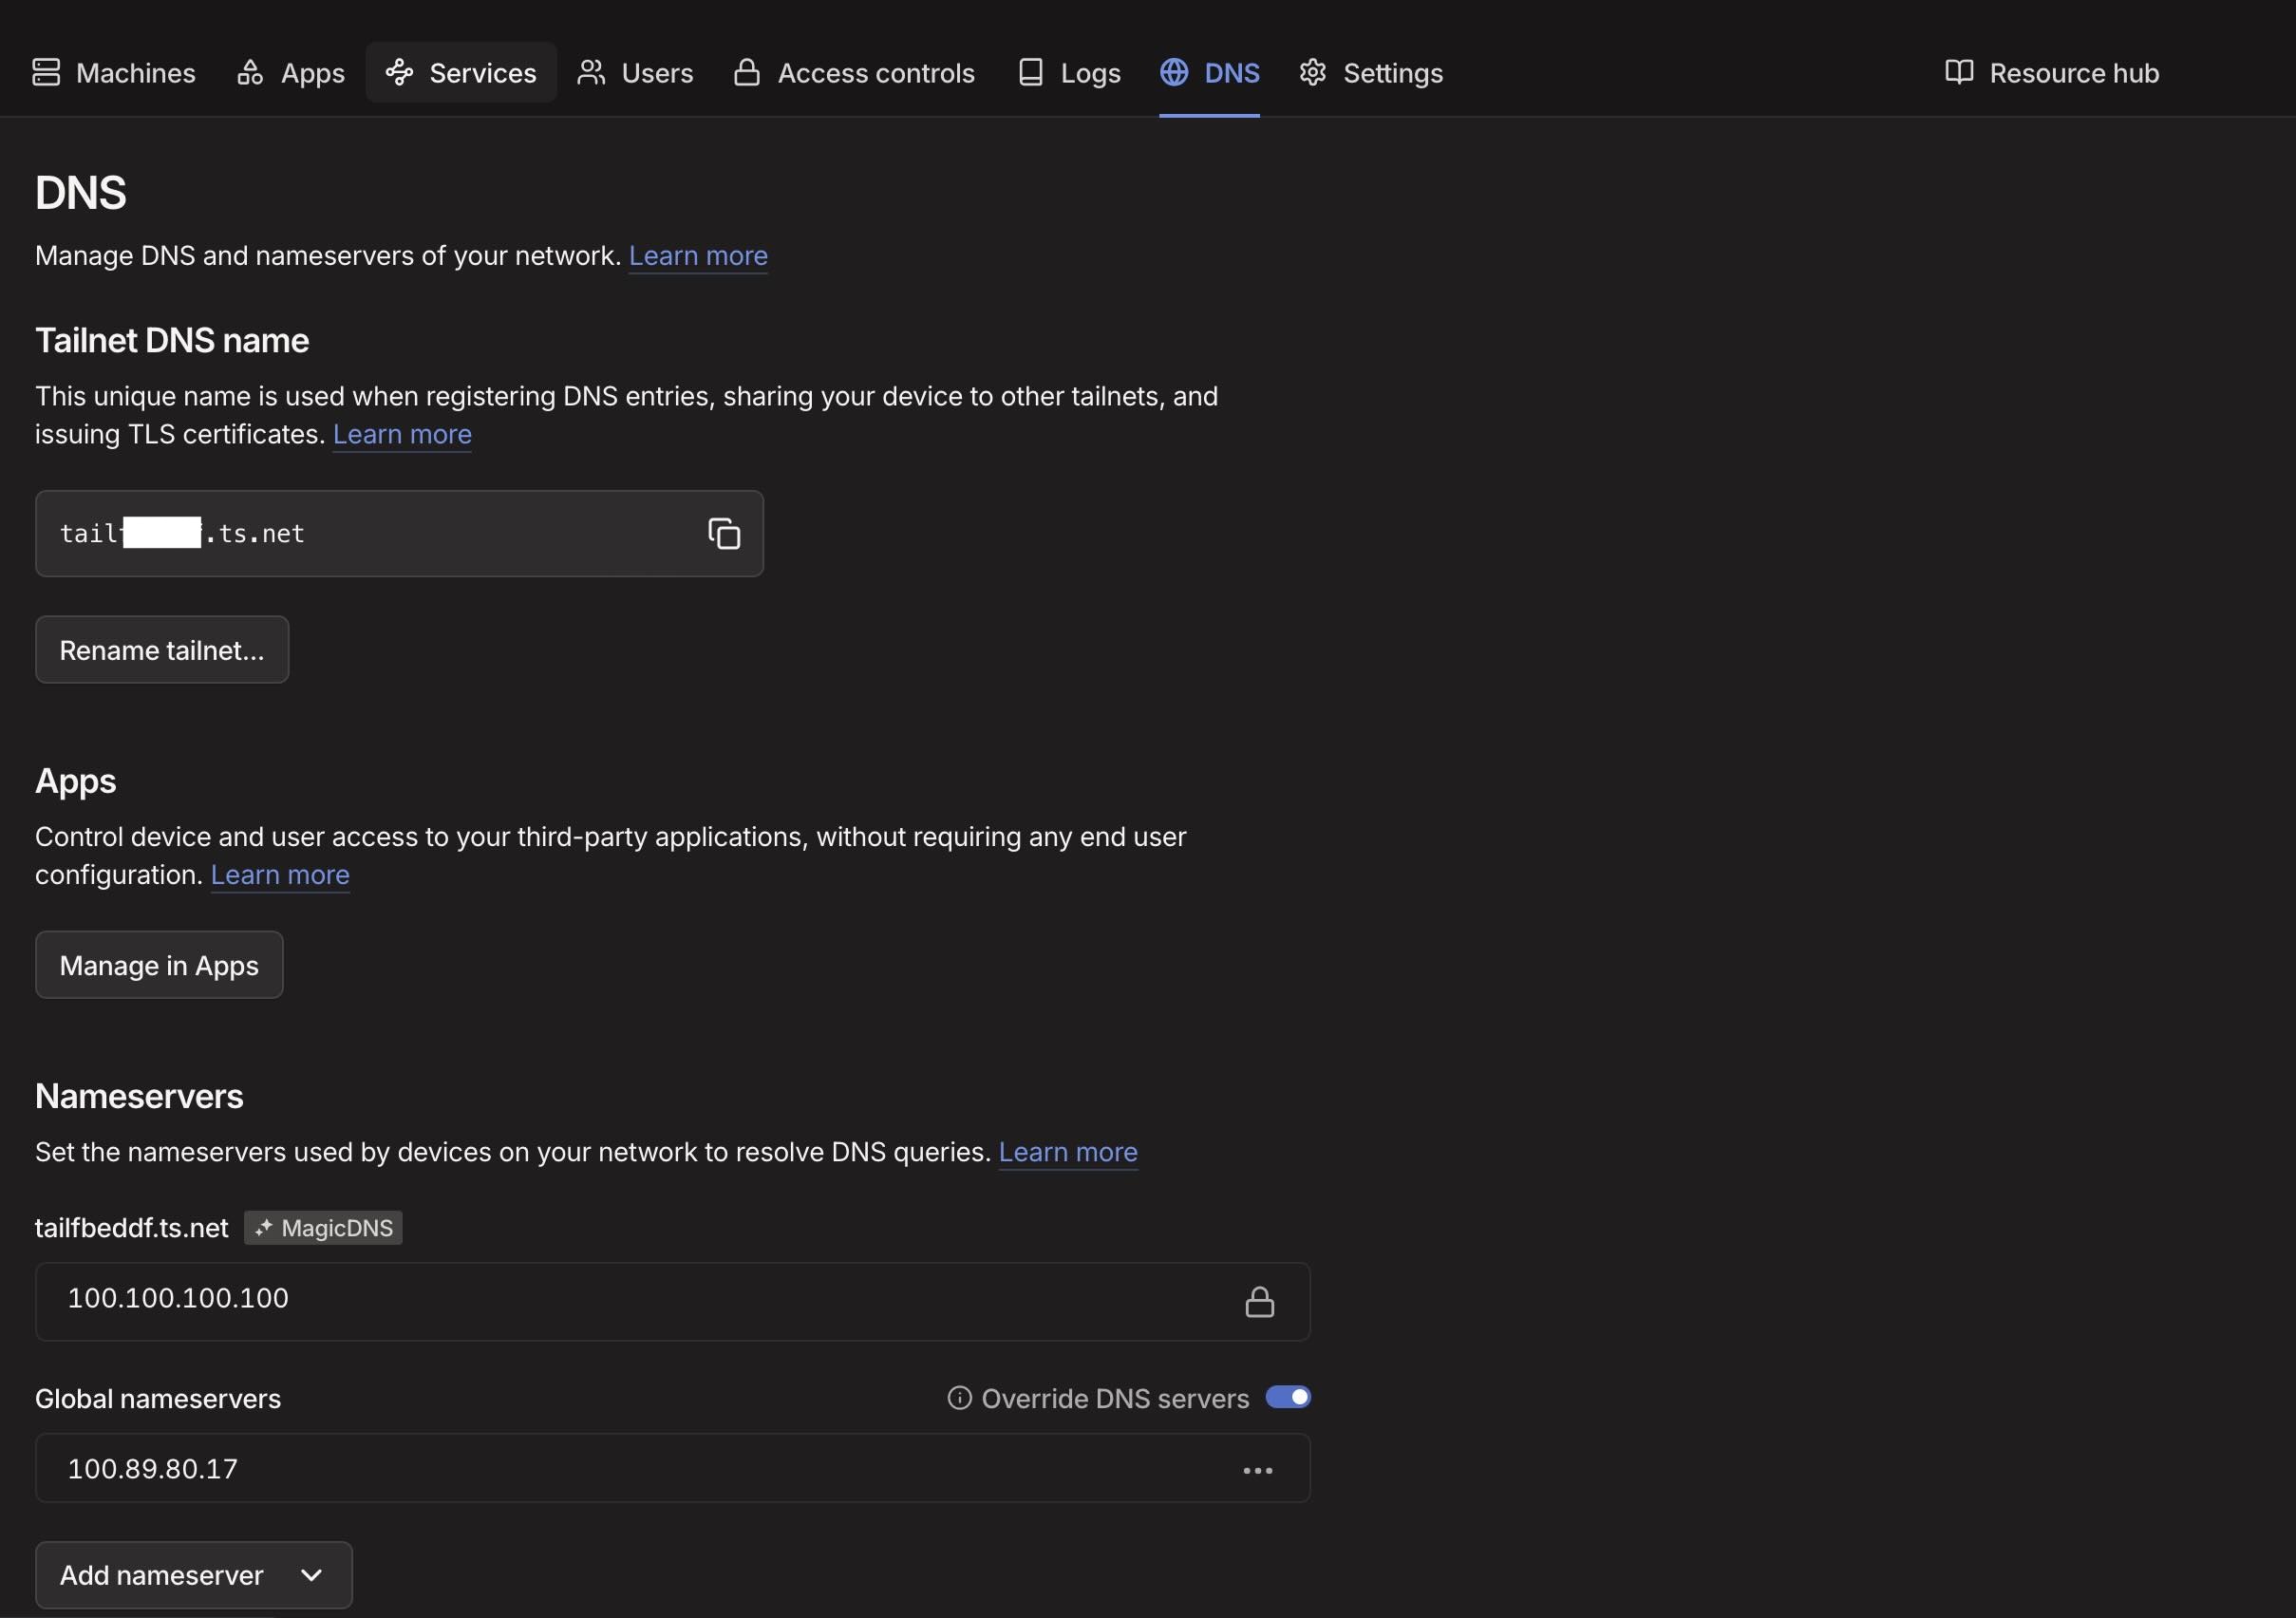
Tailscale DNS settings with Pi-hole configured as the global nameserver
Using Tailscale on your phone
Tailscale has apps for iOS and Android. Once installed, you can add a shortcut to your Control Center (iOS) or Quick Settings (Android) to toggle it with a single tap.
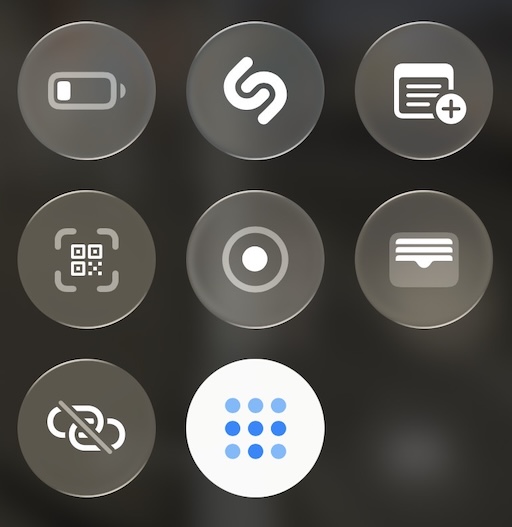
Tailscale shortcut in iOS Control Center for quick access
(Optional) Use a device as exit node
An added bonus of a Tailscale network is that you can use the Raspberry Pi as an exit node, making it possible to route all traffic as if it was originating from it. This is useful when you travel abroad and want to access geofenced content, or if you are on an untrusted network.
You’ll have to make sure that you enable IP forwarding on the Pi, which is explained in details in the Tailscale doc. Then you just need to run
sudo tailscale set --advertise-exit-node
sudo tailscale up
The complete setup
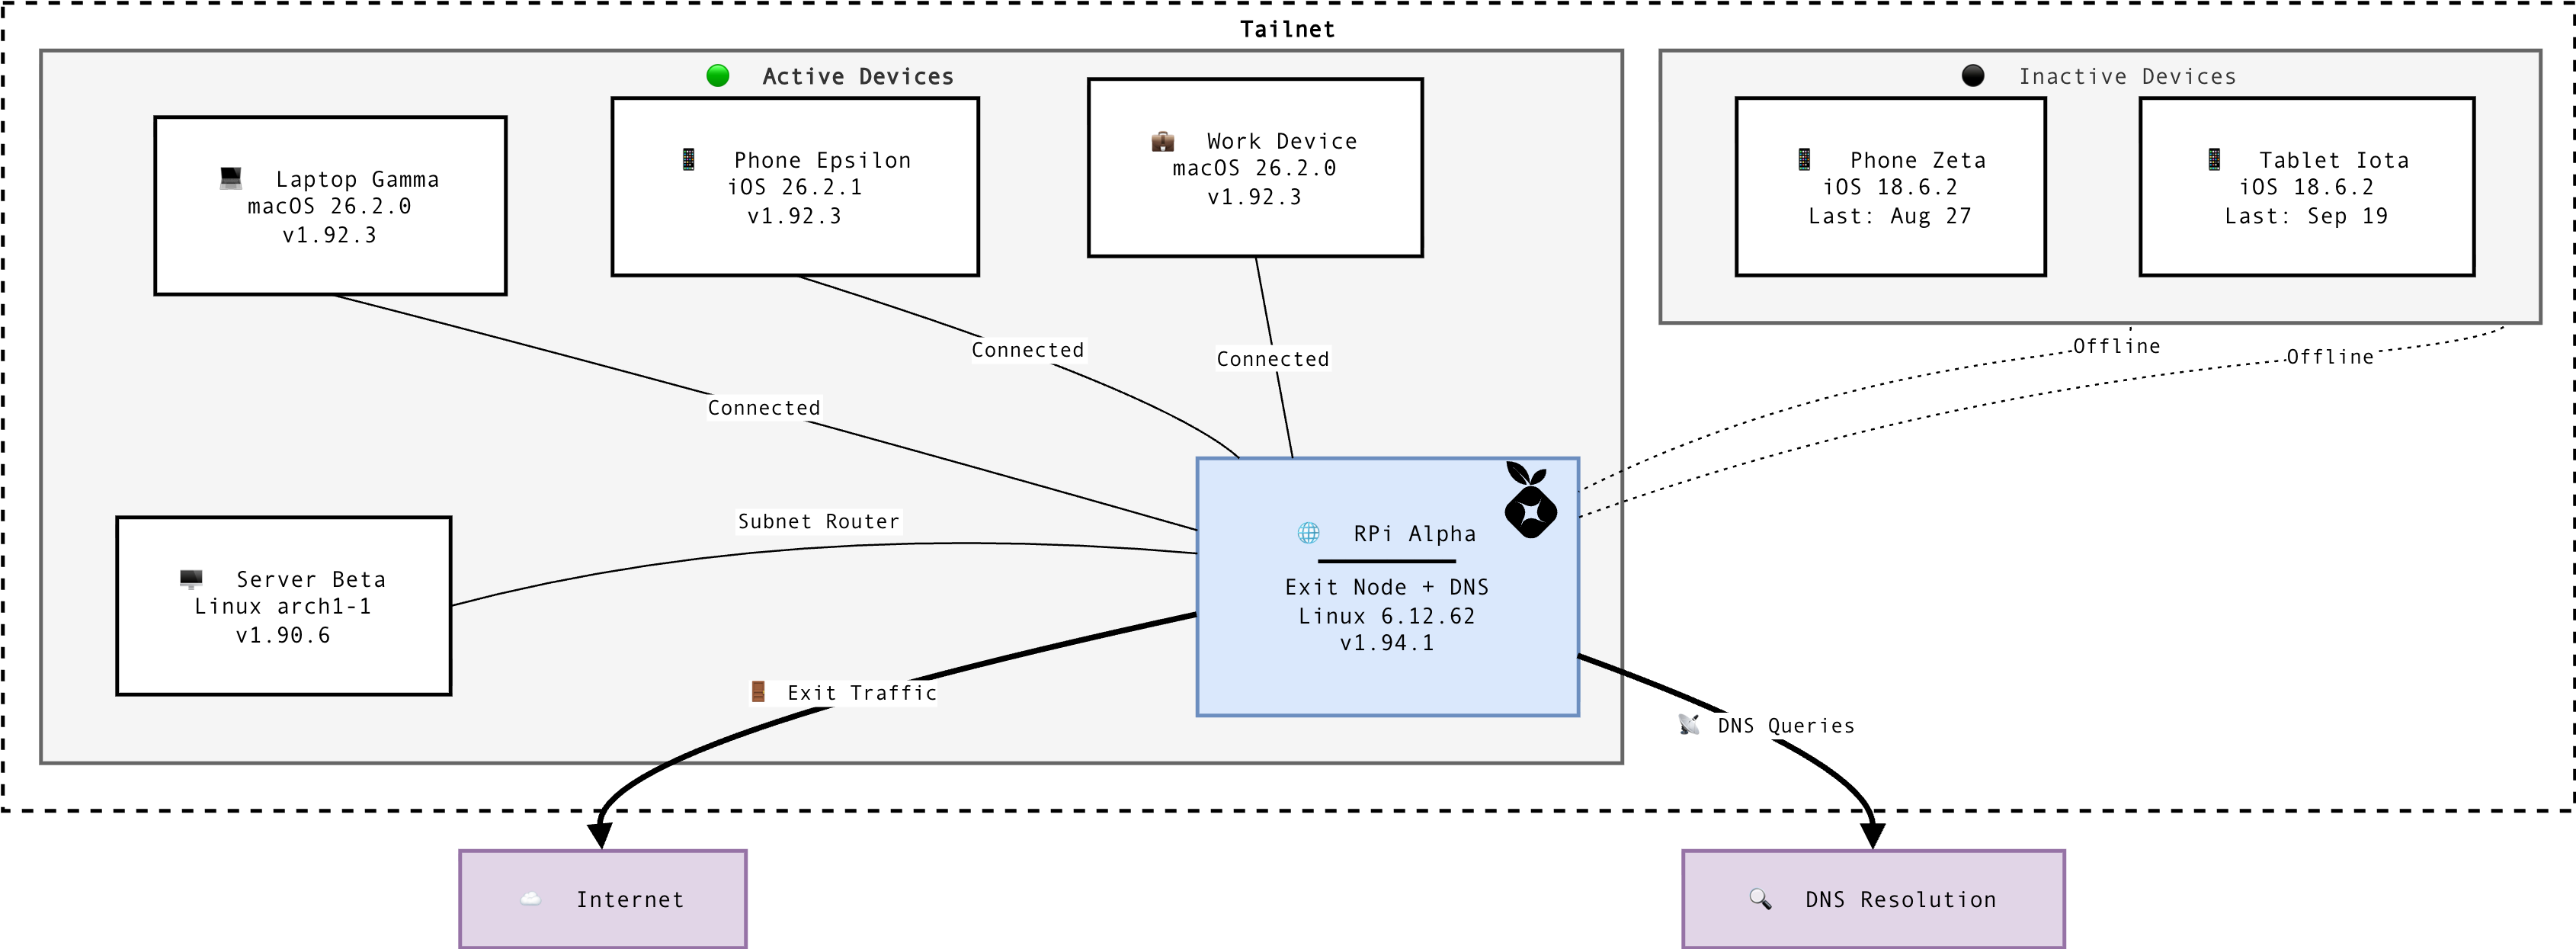
Overview of the tailnet architecture with Pi-hole DNS and exit node
That’s it. You now have a portable VPN and adblocker that follows you everywhere: no subscriptions, no third-party services logging your traffic, and full control over what gets blocked.
Loading comments...